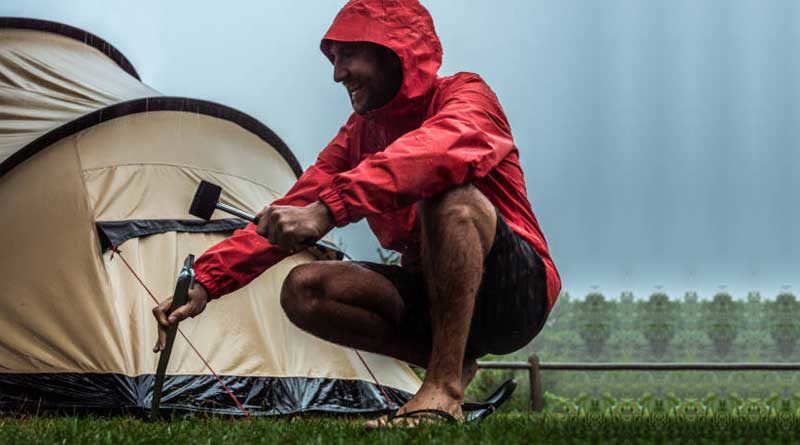
How to Pitch a Tent in the Rain: 13 Useful Tips
Pitching a tent in the rain requires practice. You can’t simply go in the rain and try to pitch a tent for the first time and think that everything will go as you have visualized it in your mind. Try out your gear before leaving to get a sense of how your gear works and developing a little bit of muscle memory about it.
Remember, when pouring down, you would have to be quick and swift. The more time you take, the harder your task becomes. Practice using your gear quickly and correctly to avoid mistakes that will cause you more work and frustration. Practice the method of pitching the tent that you have decided and see how it works. Aim for speed and accuracy.
1. Choose the Right Spot
Choosing the right spot while camping is of strategic importance. It is the foundation that will dictate whether you will successfully be able to pitch your tent or not. Therefore, choose your camping spot very carefully. Do not pitch your tent in a dry riverbed. Rain could happen at any time and you could easily find yourself in the middle of a flowing river.
Once you select your spot, you would have to make some effort to keep it from getting wet further. Find a place on the lee side of a natural windbreak. Pick a location on higher ground. Avoid low-lying areas, depressions, gullies, hollows, canyon floors, etc. Do not camp at the bottom of the slope where water gathers.
2. Pack Tent Parts Separately
Pack the parts of your tent like poles, inner tent, fly, separately instead of rolling them all together into an all-in-one sack. This way, each part of the tent can be set up without exposing the other parts to the rain. If the parts are rolled together, then you would have to unroll all of them increasing the chances of exposing them to the rain and getting them wet.
3. Roll the Fly with Exterior Outwards
Roll the fly outwards while packing your tent. It is fine if the outside of the fly gets wet while setting up the tent. But if the inner part gets wet, it will drip inside the tent. Fly can be pitched this way without getting the inside of the tent wet.
4. Keep the Tent Zipped
Make it a habit to zip all the openings of the tent whether doors, vents, or windows. This will be helpful while setting up the tent. It will also save you time and you can move on quickly. Otherwise, water will enter the tent while pitching.
5. Set the Tarp First
This is the most useful tip while pitching the tent in a downpour. This strategy can be employed in areas with a lot of trees. Setting up the tarp will provide you with a relatively dry area to work with. If you don’t have a tarp then use the rainfly. This works best with two or more people. But if you are a solo camper, then make sure you have enough practice.
6. Get a Single Wall Tent
A single-wall tent is faster and easier to set up than a double-wall tent. How to tell if it’s a double or a single wall tent? If you have the rainfly and the tent separate then it is a double-wall tent. They are the most difficult to set up as the most vulnerable part has to be set up first.
Single wall tents just have one waterproof layer that can be erected in one go. As long as the doors and vents are closed, it can be pitched without the rain getting inside. However, single-wall tents have condensation issues. But the newer generation of single-wall tents has better ventilation so condensation is not an issue.
7. Fly-First Method
The fly-first method means that you pitch the tent’s fly first and then set up the inner tent which keeps the inner tent dry. There are many ultralight backpacking and fastpitch tents that have this option but you would have to buy their groundsheet as well which has grommets specifically placed for the tent’s poles.
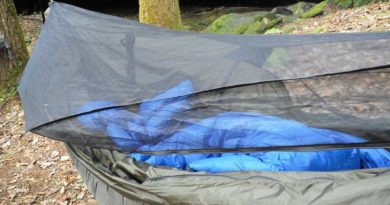
8. Bring a Waterproof Bivvy
Having a waterproof bivvy is very useful if the situation gets out of hand. Backcountry explorers mostly carry a bivvy and some even consider it to be an essential item because they can be useful in many situations. There are always chances of your tent getting wet from the inside. This is where a waterproof bivvy comes in handy for sleeping and keeping yourself warm.
9. Wait Out the Storm
As the saying goes “good things come to those who wait”. Sometimes it is probably wise to wait. You can wait for the rain to stop if it is possible. Take shelter and chill. Many hikers don’t recommend waiting under a tree because of the lightning and falling limbs. If you have a lightweight tarp, set it up to make a shelter.
10. Rain Cover for Backpack
Every backcountry hiker knows how important it is to keep the gear dry. If your gear gets wet, that is a whole different set of problems. Dry materials make it easy to pitch the tent in wet conditions. Sleeping bags and clothing are the most important things to keep dry so pack around them accordingly. So it is always a good idea to get a backpack with a built-in rain cover.
11. Set up Camp in the Day
Setting up a tent is already hard when things are wet. You can’t let the darkness be an added factor to make it harder. Although, headlamps are useful. However, your vision would still be extremely limited making it easy to miss a good spot or even end up in a dangerous place like the edge of a fall which may cause serious injury. Seeing in the rain is very difficult and there won’t be any moon or stars to help you in the rain as well.
12. Check Weather Forecast
Before you go out camping, always check weather forecast about the site that you are going to be at. Weather forecasts are essential as they can tell you if there is going to be rain at the camping site, if yes, then how much, i.e. heavy, moderate, or light rain.
This information can help you pack your gear accordingly. For example, if there is heavy rain forecast, then you might have to pack extra clothes, sponges, towels, and other stuff that might help you get dry because things get wet in heavy rain and they need to be dried out. Always do your research; don’t go in blind.
13. Make a Plan Before Leaving
Make sure that you have a solid plan before you leave for the camping site. This will save you time and the frustration that you might otherwise, feel at the site if you are unprepared. Your plan will be based on your research and it will help you decide what kind of gear and strategies you will utilize in the situation that you will face. If you have partners then discuss your plan with them and make sure all of you are on board with the plan.